Transfer parcels
To change a parcel's ownership after the property has been sold, you can perform a transfer directly from a parcel's record.
Prerequisites
Edit Transfers permission is required to perform and edit parcel transfers.
Transfer a parcel
- Go to the appropriate parcel.
- Select the Transfer tab.
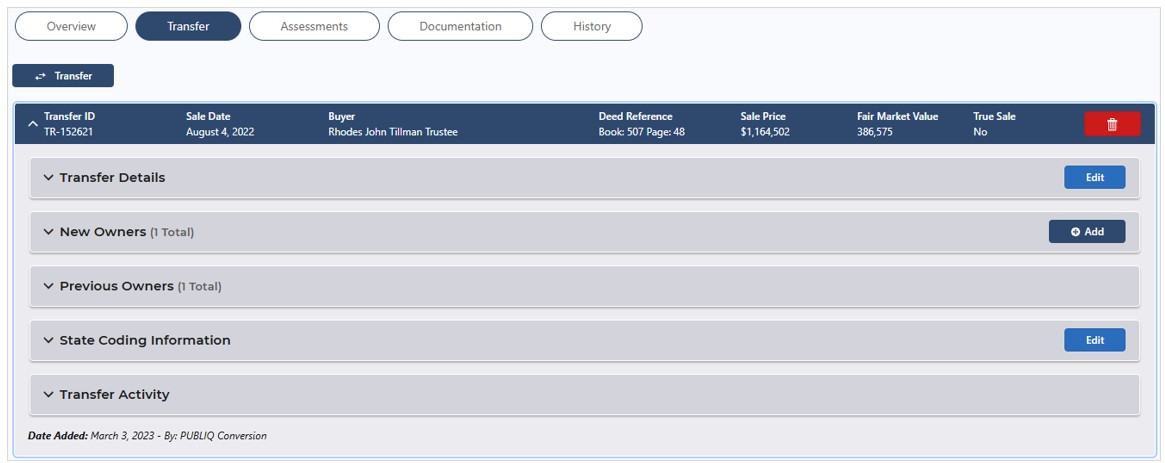
- Select Transfer.
The Transfer Parcel wizard displays.
Step 1: Add Transfer Details
-
Populate the fields with sale information.
-
Sale Date: Enter or select the sale date.
-
Assessable Transfer of Interest (ATI) (optional): Enter or select the date of the ATI.
Note: By default, this date matches the Sale Date.
- Recorded Date (optional): Enter or select the date the sale was recorded.
- Is This a True Sale? (optional): If the sale was a true sale, set the toggle to Yes. If not, leave the toggle set to No.
- Sale Price (optional): Enter the sale price of the parcel.
- Deed Book and Page (optional): Enter the deed book and page numbers.
- Deeded Acreage (optional): Enter the number of deeded acres.
- Plat Book and Page: The plat book and page fields automatically populate from the parcel Overview. To change them, select Edit.
Note: During this process, Plat Book and Page Numbers updated here are also updated on the parcel Overview > Profile panel.
- Note (optional): Enter any notes about the transfer, up to 500 characters.
-
Select Next: State Coding to go to Step 2.
Step 2: Add State Coding Information
- Populate the optional fields as needed.
- SCDOR Class: Select the parcel's DOR class.
- Land Type: Select the type of land, either Improved or Vacant.
- Result of a Parcel Split?: If the transfer results from a parcel split, set the toggle to Yes. If not, leave the toggle set to No.
- Inherited?: If the parcel being transferred has been inherited, set the toggle to Yes. If not, leave the toggle set to No.
- NTS Code: Select the Not True Sale code.
- NTS Remarks: Enter any remarks regarding the NTS.
- Owner Exempt Status?: If the owner is exempt, set the toggle to Yes. If not, leave the toggle set to No.
- Select Next: Add Owners to go to Step 3.
Step 3: Add Owners
-
Select or create the owners to whom the property is being transferred.
-
To select a current owner: In the Current Owners to Add panel, select the checkbox for the owner, then select Add to Transfer.
-
To select an existing owner from the system: Expand the Search and Select Owners to Add panel, search for the owner, select the checkbox for the owner, then select Add to Transfer.
-
To create a new owner: Expand the Search and Select Owners to Add panel, select Create Owner to create a new owner record.
-
Select the Confidential toggle to mark an owner as Confidential.
-
For an Individual, First Name and Last Name are required.
-
For an Entity, Entity Name is required.
After populating the fields, select Add to Transfer.
Important: You must select Add to Transfer after selecting the owner checkbox(es) in order to add the owners. Selected owners display in the Owners to Add panel. -
- Select Next: Add Owner Details to go to Step 4.
Step 4: Owner Details
-
Populate the fields with owner information.
-
Ownership Type: Select the type of owner.
-
Percent Ownership (optional): Enter the percent of the parcel owned.
-
Is Taxpayer? (optional): If the owner is a taxpayer, set the toggle to Yes. If not, leave the toggle set to No.
-
Notice/Mailing Name Line 1: Enter the name to display on notices, if different from the name on the owner record.
Note: This field only displays for the owner set as the Taxpayer. -
Notice/Mailing Name Line 2 (optional): Enter the name to display on notices, if different from the name on the owner record.
-
Send this owner a duplicate tax bill (optional): Select the checkbox if a duplicate tax bill should be sent to a non-taxpayer.
Note: This field only displays if there is more than one owner. -
Apply to all owners (optional): Select the checkbox to apply the same information to all owners.
Note: This field only displays if there is more than one owner.
-
-
Select Next: Review and Transfer to go to Step 5.
Step 5: Review and Submit
-
Verify that the information is correct.
To adjust any information, select Edit on the appropriate panel.
You can also select a tab at the top of the wizard to return to it.

-
Select Transfer Ownership to complete the transfer.
The parcel is transferred to the new owner(s).
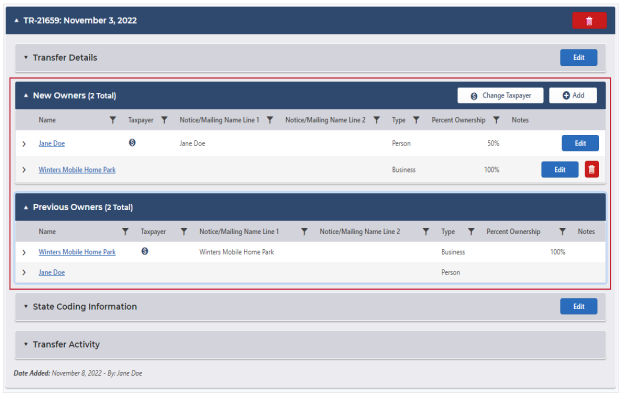
Transfer information, including the sale details, new and previous owners, and state coding information, display on the parcel's Transfer tab.

If you created new owners in Step 3, the new owners now have records in the system. To go to the owner's record, select the owner's name from the New Owners or Previous Owners panel.

You can also use Owner search or select the owner's name from the parcel's Overview.
On the owner record, you can find the owner's currently and previously owned parcels.
- For the new owners, the parcel displays in the Currently Owned Parcels panel.
- For the previous owners, the parcel displays in the Previously Owned Parcels panel.